

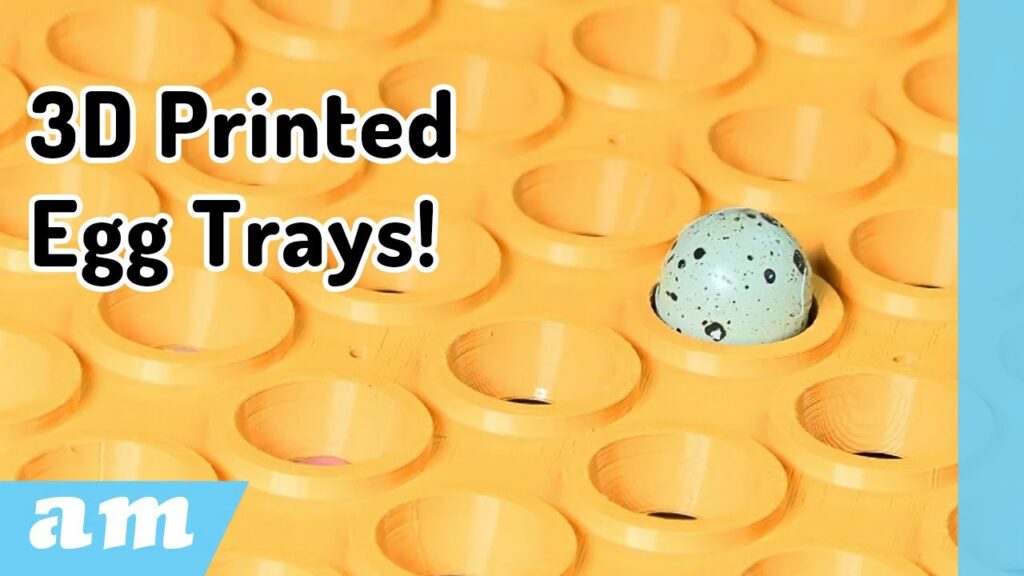
We had another 3D printing project come up recently, and this one started because of a fairly simple problem: quail eggs don’t fit into anything properly.
If you’re dealing with normal chicken eggs, incubation trays are easy to find. You can buy them almost anywhere. Quail eggs, on the other hand, are much smaller, and most of the time you’re either modifying something or hoping they don’t roll around too much. That’s never ideal, especially when incubation is involved.
So instead of trying to adapt something that wasn’t meant for quail eggs, we decided to design a tray specifically for them.
Watch video on YouTube: https://www.youtube.com/watch?v=dtyA7LYt3sE
The first thing we needed was the correct egg shape. That sounds obvious, but if the egg doesn’t sit properly, the whole tray becomes pointless. We started with a basic sphere in the design software and then adjusted it using real measurements taken from an actual quail egg. Using a vernier caliper, the egg came out at roughly 34 mm tall and about 25 mm wide. Once those numbers were entered, the shape was already very close to what we needed.
From there, a simple cylinder was used to create the cup that holds the egg. The radius and wall thickness were adjusted until the egg sat comfortably inside. The idea wasn’t to clamp the egg tightly, but to support it properly while still allowing a bit of movement. Quail eggs aren’t all identical, so a little tolerance is important.
Once the cup was sorted, the tray itself came together. A flat rectangular base was created, and then corner pillars were added. These pillars are important because they keep the spacing between trays consistent when stacking them inside an incubator. To make sure everything lined up exactly the same each time, temporary guide shapes were used during placement and then removed afterwards.
The egg cups were duplicated across the base until the full tray was filled. A few extra support pieces were also designed and printed separately. These get glued in later and are there purely for strength, just to make sure the tray doesn’t bow or sag if there’s weight above it. There’s also a cut-out underneath so that the next tray can slot in neatly, allowing multiple trays to stack without shifting around.
Once everything was grouped together, the design was exported as an STL and moved over to Cura for printing.
For the first print, we used a draft profile. The goal wasn’t perfection at this stage, just to see if everything worked as intended. Infill was kept low at 5%, which is more than strong enough for this kind of part. Supports were enabled, touching the build plate, using a zigzag pattern at very low density since the supports are small and don’t need to be strong.
After slicing, the file was saved and sent to the printer.
When the print came off the bed, it looked exactly how we hoped. There were a few fine strings, which is normal, but nothing a quick clean-up couldn’t fix. The separate support pillars were printed, glued into place, and the main supports were removed from underneath so the next tray could slot in properly.
Then came the important part: testing it with an actual egg.
A standard chicken egg, as expected, was far too big. But when a quail egg was placed into the tray, it fit really well. There’s just enough wiggle room to allow for slightly different egg sizes, but not so much that the egg feels loose. The egg is supported all the way around, with space underneath for airflow, which is exactly what you want during incubation.
The tray is designed to be used upside down in the incubator. Every few days, it can be tilted in alternating directions to mimic how a mother bird naturally moves her eggs. This helps prevent the yolk sac from sticking to the shell, which is critical for proper development and hatching.
Overall, the project turned out better than expected. A big part of that comes down to the material choice. The PETG filament from AM.CO.ZA printed cleanly, feels strong, and is tough enough to handle long-term use. It’s easily one of the most reliable filaments we’ve worked with, and the colour suited the project perfectly.
At this point, it’s just a matter of printing a few more trays and putting them to use.
If you enjoyed this build and want to see more practical, real-world 3D printing projects, be sure to subscribe and turn on notifications so you don’t miss what’s next.
In a time where AI and smart technologies are transforming industries, AM.CO.ZA has emerged as a leader in CNC routers and printing machines. With more than 11 years of experience, they offer a diverse range of advanced products, including CNC Routers, Large Format Printers, Vinyl Cutters, Laser Cutters, Plasma Cutters, and DTF Printers. Their solutions serve a wide array of sectors, from manufacturing and engineering to the creative arts.
Machines, Consumables and Parts Available from https://buythis.co.za/
For more info on Advanced Machinery visit https://am.co.za/
Subscribe to AM.CO.ZA’s YouTube Channel: https://www.youtube.com/@AchievementMatters?sub_confirmation=1
Chat with us by sending “hi” on WhatsApp to 060 600 6000.